
Upgrading your computer to the latest version of Windows may be the best way to stay up to date. However, Windows 11, introduced in 2021, brings with it some high system requirements. Therefore, not every computer is suitable for Windows 11 installation. However, there is an official method for those who still want to install Windows 11.
How to install Windows 11 on old computer?
Before you start explaining this method, you can check on Windows Update whether your computer is really supported by Windows 11. Then check the minimum requirements and see if your computer meets them.
Windows 11 minimum system requirements:
- Processor: 64-bit, dual-core, at least 1 GHz
- Memory: 4GB
- Storage: at least 64GB
- Video card: DirectX 12 compatible
- TPM: 2.0
After checking all these, if your computer meets the minimum system requirements, you can easily switch to Windows 11. However, if you still want to install Windows 11 despite not meeting these standards, you can follow the steps below. Before starting the steps, let me remind you once again that this download may be harmful to your computer.
1. Download Window 11 ISO
Upon the reactions, Microsoft started to offer files that allow anyone to download and install Windows 11 on its website. Thus, anyone can download and install Windows 11, regardless of whether the computers are compatible or not.
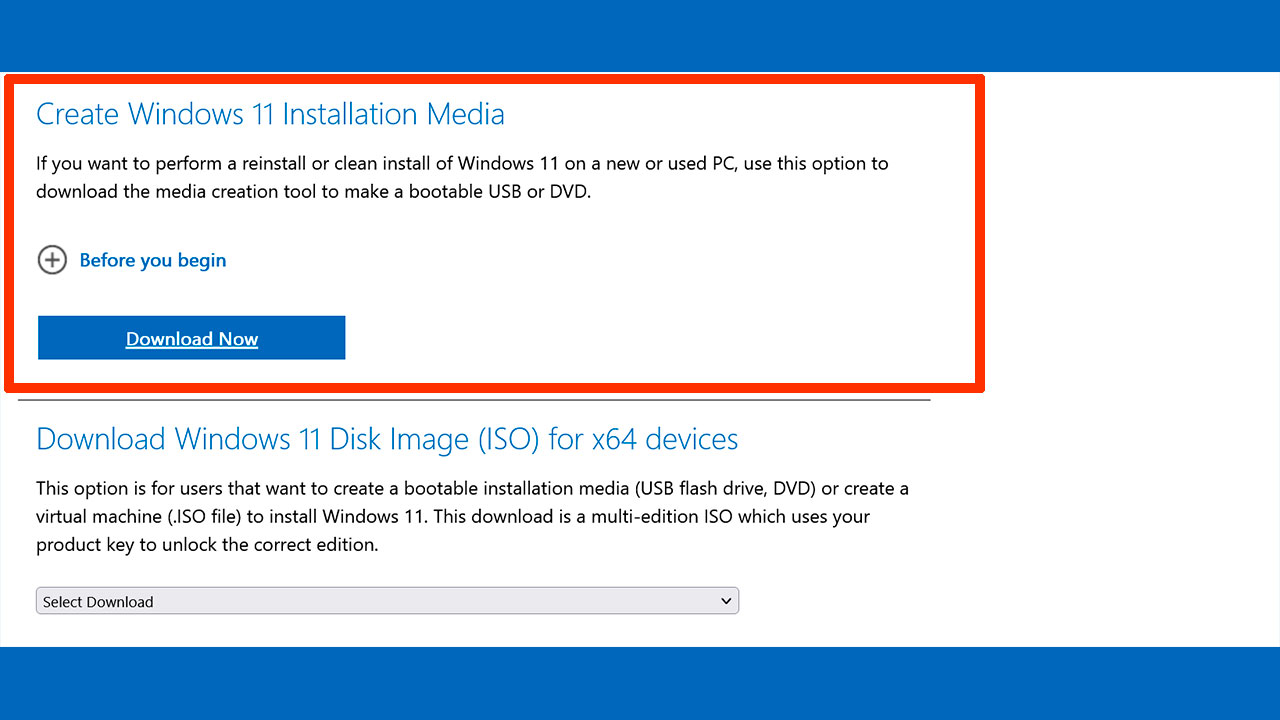
You can get the Windows 11 ISO file by going to this page. On this page, you can continue with one of the options to Create Windows 11 Installation Media and Download Windows 11 Disk Image (ISO). While both of these options lead to the same result, the media creation tool is probably the better option if you are going to upload the setup file to a different storage medium.
After this step, a file named mediacreatintool.exe will download to your computer. After clicking on this file, the ‘License terms’ page will appear. After reading these terms, click “Accept” and select “Create installation media for another computer” and click “Next”.

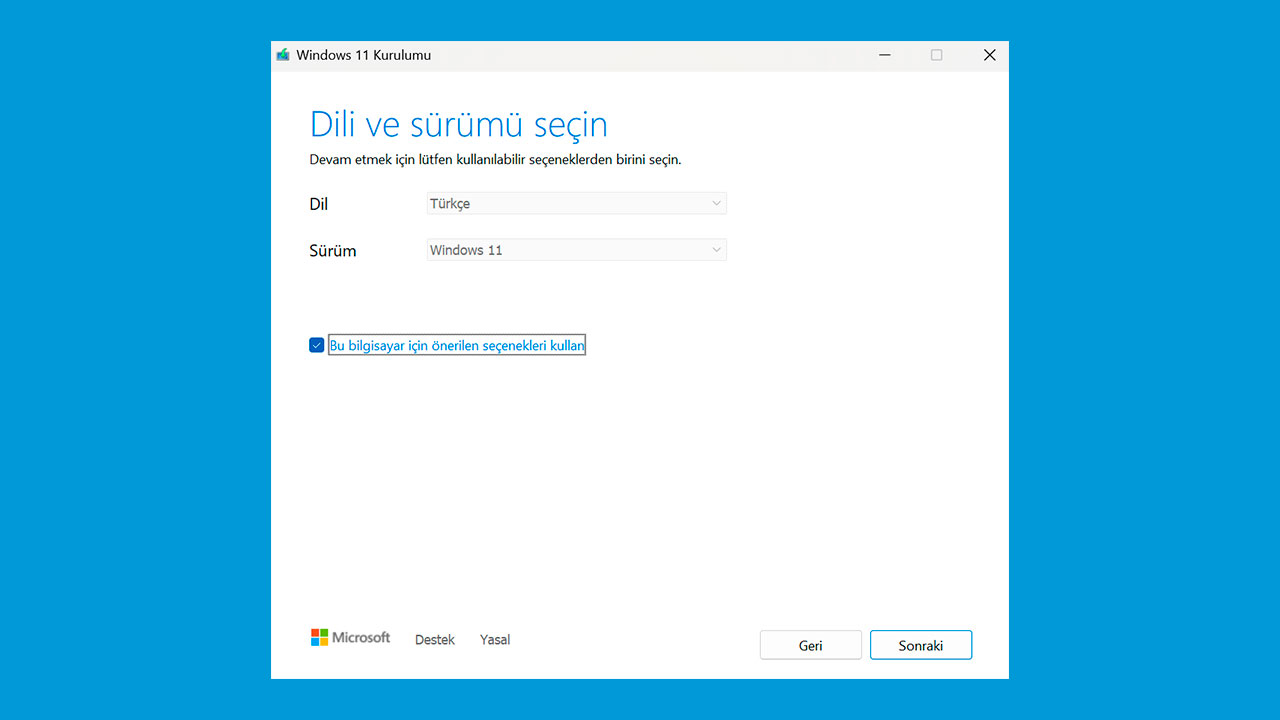
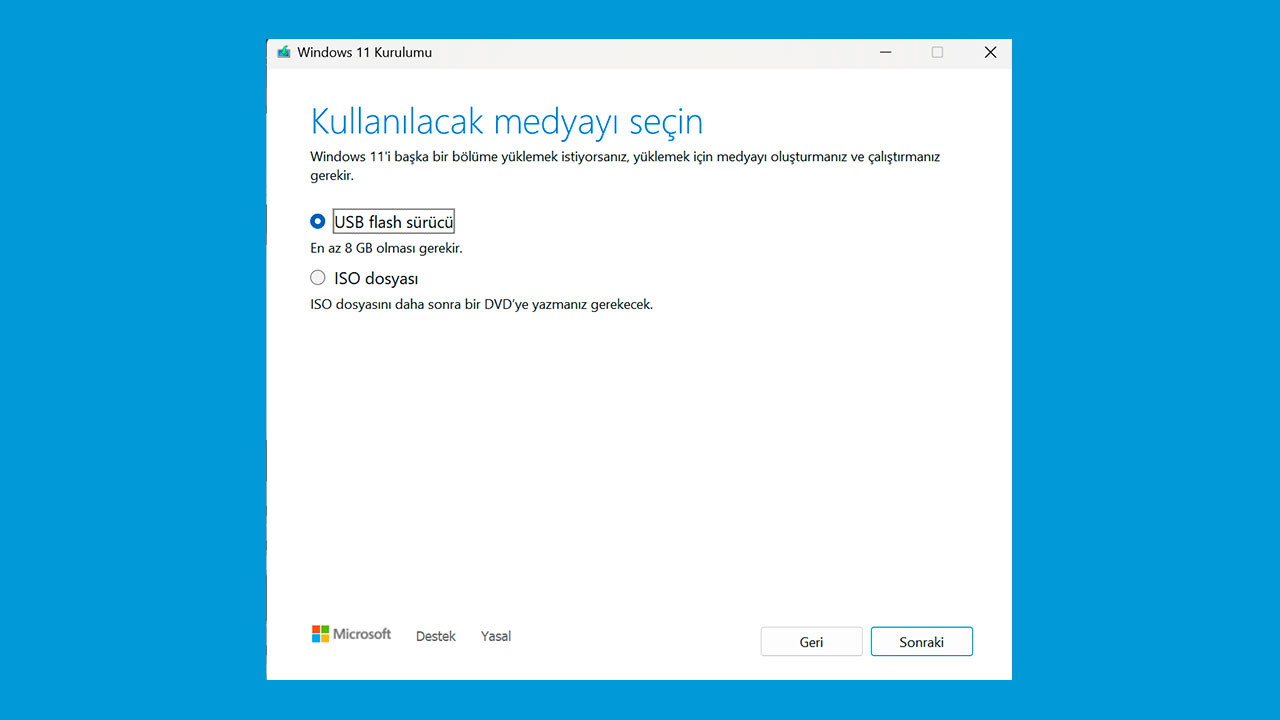
Then you can choose the language, version and architecture of the Windows 11 installation. After skipping these parts, insert your flash memory (it should be at least 8 GB). On the Choose the media to use page, click the “USB Flash drive” option and wait for the installation file to download to your drive.
2. Edit the Windows Registry
After saving the installation file, there is one more step to prepare your computer for Windows 11. First, you need to make some changes to the Registry for Windows 11 to run properly. For this you can follow the steps below:
- Open the Windows Registry.
- Follow HKEY_LOCAL_MACHINE > SYSTEM > Setup > MoSetup.
- Create a new 32-bit DWORD.
- Change the DWORD name to “AllowUpgradesWithUnsupportedTPMOrCPU” and double-click on it to change its value to “1”.
- Then restart your computer.
After these steps, the Windows 11 installation file will be able to complete the installation, ignoring problems such as TPM 2.0 deficiency or unsupported processor. After these steps, you can complete the Windows 11 installation by inserting your flash memory into your computer.
You can install Windows 11 on the old computer by following the steps above. However, once again, it is useful to warn you about the problems that may occur. So what do you think about installing Windows 11 on the old computer? You can share your views with us in the comments section.